Three Tools for Executing Jupyter Notebooks
Learn how to parameterize and execute notebooks from your terminal.


Introduction
Executing notebooks can be very helpful in various situations, especially for long-running code execution (e.g., training a model) or parallelized execution (e.g., training a hundred models at the same time). It is also vital in data analysis automation in projects at regular intervals or involving more than one notebook. This blog post will introduce three commonly used ways of executing notebooks: Ploomber, Papermill, and NBClient.
Ploomber

Ploomber is the complete solution for notebook execution. It builds on top of papermill and extends it to allow writing multi-stage workflows where each task is a notebook. Meanwhile, it automatically manages orchestration. Hence you can run notebooks in parallel without having to write extra code.
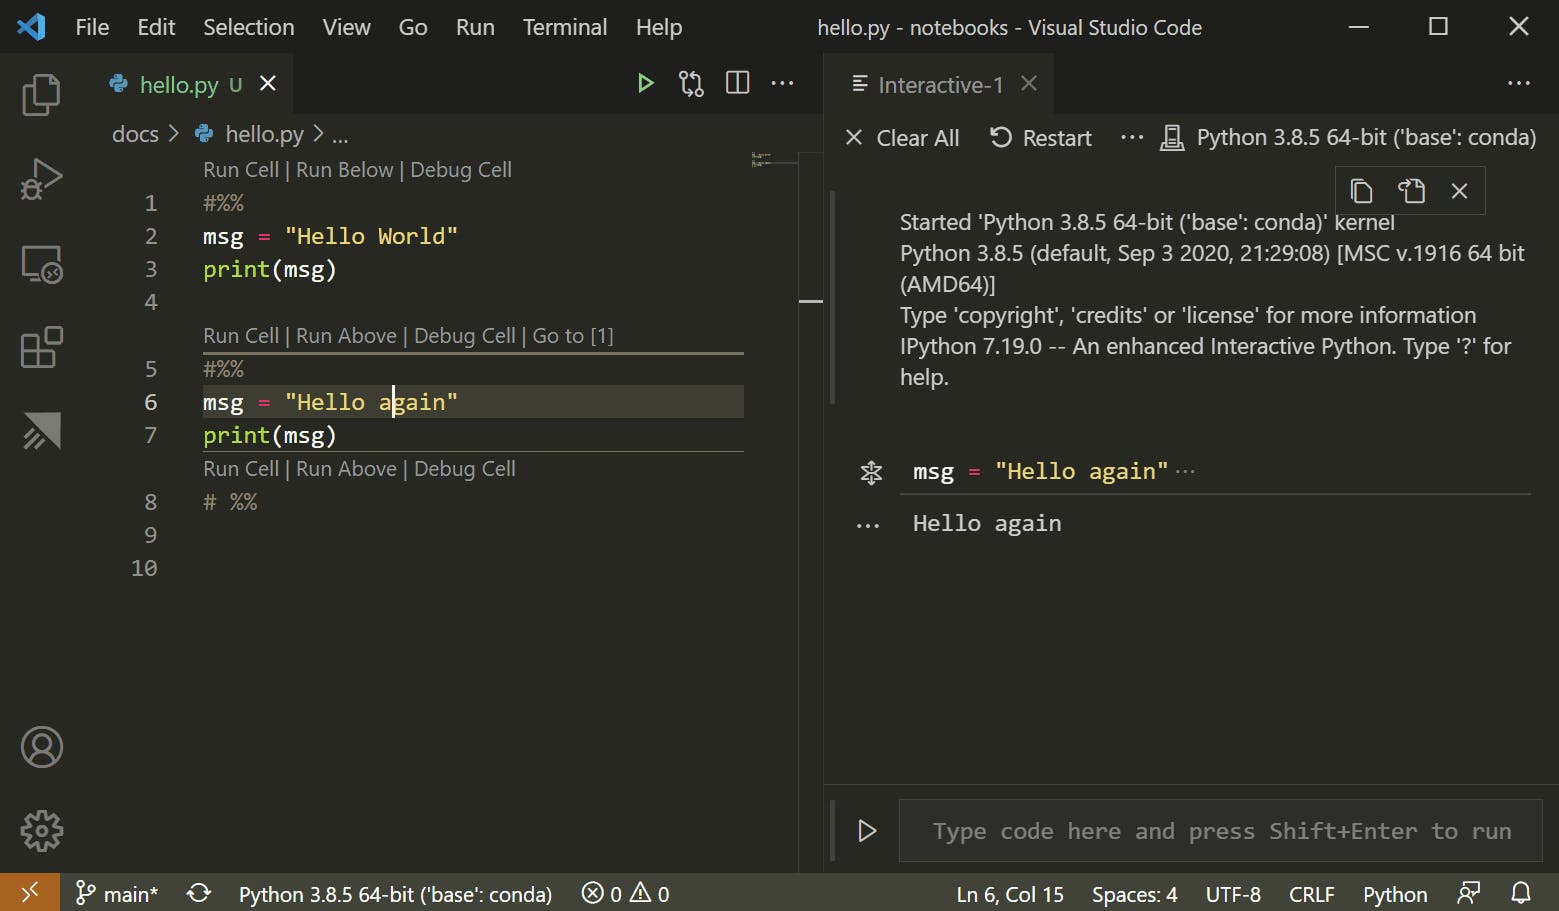
Another feature of Ploomber is that you can use the percent format (supported by VSCode, PyCharm, etc.) and execute it as a notebook, to automatically capture the outputs like charts or tables in an output file.
Also, you can export the pipelines to airflow, Kubernetes, etc. Please refer to this documentation for more information on how to go from a notebook to a production pipeline.
Ploomber offers two interfaces for notebook execution: YAML and Python. The first one is the easiest to get started, and the second offers more flexibility for building more complex workflows. Furthermore, it provides a free cloud service to execute your notebooks in the cloud and parallelize experiments.
Execute Notebooks via Python API
Ploomber offers a Python API for executing notebooks. The following example will run first.ipynb, then second.ipynb and store the executed notebooks in out/first.ipynb and out/second.ipynb.
from pathlib import Path
from ploomber import DAG
from ploomber.tasks import NotebookRunner
from ploomber.products import File

dag = DAG()
first = NotebookRunner(Path('first.ipynb'), File('out/first.ipynb'), dag=dag)
second = NotebookRunner(Path('second.ipynb'), File('out/second.ipynb'), dag=dag)
first >> second

dag.build()
Execute Notebooks via YAML API
Ploomber also offers a YAML API for executing notebooks:
tasks:
  - source: first.ipynb
    product: out/first.ipynb

  - source: second.ipynb
    product: out/second.ipynb
Then users call the following code to execute the notebook:
ploomber build
Execute Notebooks on Cloud
Ploomber also supports executing notebooks on the cloud by running:
ploomber cloud build
Please refer to this documentation for more information on Cloud Execution with Ploomber.
Papermill

Papermill's main feature is to allow injecting parameters to a notebook. Therefore, you can use them as templates (e.g. run the same model training notebook with different parameters). However, it limits itself to providing a function to execute the notebook. Hence there is no way to manage concurrent executions.
There are two ways to execute the notebook:
- Python API
- Command Line Interface
Execute Notebooks via Python API
Papermill offers a Python API. Users can execute notebooks with Papermill by running:
import papermill as pm

pm.execute_notebook(
   'path/to/input.ipynb',
   'path/to/output.ipynb',
   parameters = dict(alpha=0.6, ratio=0.1)
)
Execute Notebooks via CLI
Users can also execute notebooks via CLI. To run a notebook using the CLI, enter the following papermill command in the terminal with the input notebook, location for the output notebook, and options.
papermill input.ipynb output.ipynb -p alpha 0.6 -p l1_ratio 0.1
Via CLI, users can choose to execute a notebook with parameters in types of a parameters file, a YAML string, or raw strings. You can refer to this documentation for more information on executing a notebook with parameters via CLI.
NBClient
NBClient provides a convenient way to execute the input cells of a .ipynb notebook file and save the results, both input and output cells, as a .ipynb file. If you need to export notebooks to other formats, such as reStructured Text or Markdown (optionally executing them), please refer to nbconvert.
It offers a few extra features like notebook-level and cell-level hooks and also supports two ways of executing notebooks:
- Python API
- Command Line Interface
Execute Notebooks via Python API
The following quick example shows how to import nbformat and NotebookClient classes, then load and configure the notebook notebook_filename. We specified two optional arguments, timeout and kernel_name, which define the cell execution timeout and the execution kernel. Usually, we don’t need to set these options, but these and others are available to control the execution context.
import nbformat
from nbclient import NotebookClient

nb = nbformat.read(notebook_filename, as_version=4)
client = NotebookClient(nb, timeout=600, kernel_name='python3')
Then we can execute the notebook by running:
client.execute()
And we can save the resulting notebook in the current folder in the file executed_notebook.ipynb by running:
nbformat.write(nb, 'executed_notebook.ipynb')
Execute Notebooks via CLI
NBClient supports running notebooks via CLI for the most basic use cases. However, for more sophisticated execution options, consider the Ploomber!
Running a notebook is this easy:
jupyter execute notebook.ipynb
It expects notebooks as input arguments and accepts optional flags to modify the default behavior. And we can pass more than one notebook as well with:
jupyter execute notebook.ipynb notebook2.ipynb
Summary
In a nutshell, NBClient is the most basic way to execute notebooks and Papermill builts on top of NBClient. Both of them support running notebooks via Python API and CLI.
Ploomber is the most complete and most convenient solution. It builds on top of papermill and extends it to allow writing multi-stage workflows where each task is a notebook. Besides Python API and CLI, users are also supported to execute notebooks via YAML API or on the cloud with Ploomber.
Enjoyed this article? Join our growing community of Jupyter users
References
- Ploomber Source Code
- Ploomber Documentation
- Papermill Source Code
- Papermill Documentation
- NBClient Source Code
- NBClient Documentation
Originally posted at ploomber.io by Qixuan Liu. Reposted with permission.